There are three issues to
keep in mind when repairing plaster:
- The building is your client - you must do what is correct for the building.
- Stability of the existing plaster is key.
- Appearance is important - you must make the repair last and look good.
When looking to repair pre-1930s plaster on wood lath, brick or terra cotta block, ther are several other issue to consider too.
When most people look at plaster all they can see is the finished surface. Knowing the age of the building, where it is located geographically, and the changes it went through will allow you to determine within a certain degree of accuracy the composition of the existing plaster system.
From the European colonization of North America until the 1920s, the primary plaster used here was a mixture of lime, sand and hair applied over wood lath. In the 1890s, gypsum plaster was introduced as a way to speed up and increase job-site production. From the 1890s through the 1940s plaster technology changed from lime-sand-hair plaster on wood lath to gypsum ("hard wall") plaster on diamond metal lath. The changes were gradual and involved the intermixing of 18th-, 19th-, and 20th-century technologies.
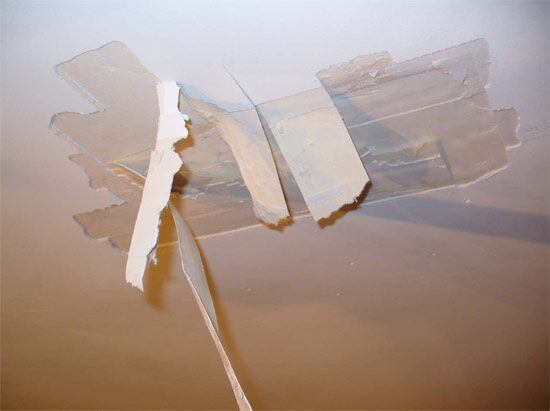
Most damage occurs as a result of the building moving more than the plaster can physically accommodate. The wood lath that is attached to the building's structural system bears the brunt of any movement, which in turn weakens the keys and breaks them off from between the lath. Since the keys are what hold the plaster to the wall (or ceiling) the plaster then cracks and comes loose. Renewing the bond between the backside of the plaster and the wood lath is the best way to restore the plaster's original structural integrity.
Plaster repair techniques fall into three categories: Subsurface reinforcement, surface treatments, and replacement of or lamination over existing plaster.
My favorite method for dealing with plaster maintenance and repair issues is the adhesive reattachment system. Plaster reattachment consists of two different phases: 1) stabilize the plaster, 2) fill the holes and deal with cosmetic issues.
This method consists of drilling holes through the plaster to access the space between the plaster and the lath. The dust is vacuumed from the holes and a conditioner is sprayed into the holes, followed by an adhesive (injected by way of a caulk gun). The plaster is clamped in place and left to set for 24 hours. The holes and cracks are then filled with all-purpose or time-setting joint compound.
The adhesive system reattaches the plaster to the lath without compression and rigid attachment points. The adhesive reattachment is a flexible bond that moves with the building. This results in a stable plaster surface that allows the building to move independently of the plaster. Additionally, the adhesive system uses the lath under the plaster to bridge the crack, eliminating the need to use any surface treatment to hide the crack.
The pluses: There are zero troweling skills necessary. There is very little mess or waste. The adhesive takes less time and results in a better bond than any other method of plaster repair. The adhesive cleans up with water. There are no landfill fees and no demolition, and all the packaging is recyclable.
The minuses: There is a learning curve. Since you're adhering the plaster to the lath blindly, you have to know how to translate what you're feeling and hearing into knowledge. Presently the adhesive system is only available for purchase by mail order via the Web or telephone through a single manufacturer.
The combination of screws, metal plaster washers (also called ceiling buttons) and mesh or paper tape (to cover the cracks) has been used for a long time. The plaster washers and screws hold the plaster onto the lath. The mesh or paper tape applied with joint compound hides the cracks. In another method, tape and joint compound (or plaster) cover up cracks without screws and plaster washers.
The pluses: The materials are inexpensive and readily available, and they help to stabilize the plaster.
The minuses: It takes considerable troweling skills to apply the joint compound, and you have to apply enough material to cover the screws, plaster washers, and mesh tape - leaving a hump that can be visible on the plaster surface. The sanding creates a great deal of mess, especially with the final layer, not to mention the enormous amount of time it takes to complete the job using this method.
The screws and plaster washers, while providing stability, offer a very rigid, narrow point of attachment. This can cause problems in older houses as they continue to move. Additionally, the joint compound is relying on the paint layer's attachment to the plaster to keep it on the wall. Old houses often have paint delamination issues on ceilings (due to layers upon layers of paint) that need to be addressed when applying material on top of the paint.
Another surface treatment
Plaster skim coating involves the application of a bonding agent to the plaster, then the rolling out of wide synthetic mesh and application of a finish coat of plaster to the mesh. This application creates a new plaster surface. On a smaller scale, this technique can be used on a crack-by-crack basis.
The pluses: Your wall (or ceiling) has a layer of new plaster (which is especially nice if a new look is what you want). The materials are available in most masonry supply houses or online.
The minuses: It takes years of trowel skills to learn how to finish plaster correctly. This is a highly skilled job. Again, you are relying on the underlying paint to support the weight of the new plaster, and the plaster is not supported except in a superficial way. The buildup of material on the surface of the plaster being repaired will affect the reveal of the (wood) trim as well as adding additional weight for the paint layer to support. It's messy and expensive.
The application of synthetic matting as a complete wallcovering mimics the techniques of the early 20th century in which wallpaper was applied to plaster to help support the plaster's structural aspects. An adhesive base is applied to the plaster surface, upon which the synthetic mat is applied and covered with a roll-on topping coat. This method depends on the degree to which the paint is attached to the surface of the plaster underneath the mat.
The pluses: You get a uniform paintable surface - not a plaster surface, because it's covered over, but a surface that's uniform and paintable. The skill level to install this material is moderate, similar to wallpaper. The manufacturer's instructions recommend that damaged plaster be stabilized first, adding an additional step.
The minuses: How do you repair this surface if it gets damaged? What do you do when the plaster under the coating moves and re-cracks or comes away from the lath underneath? There is the bonding-agent smell and the disruption of an entire room that comes with covering entire walls and ceilings. The aesthetics of the original plaster surface are sacrificed with this repair option. This material is available online or at your local building supply store.
Replacement is an option that should be used as a last resort. There is considerable mess, expense and skill involved, not to mention additional material to stuff into our landfills and the carbon footprint of manufacturing new materials. This option usually means the removal of the original plaster and lath, adding it to the dumpster and putting up new surfaces. Replacement does allow you to update mechanicals as well as other retrofits you may feel necessary in maintaining your house.
The pluses: This method gives you new surfaces. Whether wallboard or veneer, conventional or traditional plaster, the surfaces will be new. This approach also more easily allows updates.
The minuses: Whatever you use to replace the original plaster will be inferior to the existing plaster. Wallboard has a paper surface. Veneer plaster is veneer in every sense of the word. It is wallboard with the appearance of plaster.
Conventional plaster is a wonderful and durable material, usually installed on wire or rock lath. When installed in a vintage building the inherent movement in the building will cause the plaster to develop its own expansion joints. These "expansion joints" or cracks will need to be addressed via one of the above alternative methods of plaster repair.
Any replacement alternative requires skill to install, generates material waste and mess, is expensive, and while providing a short-term pleasing appearance, does not have the centuries-old track record of original plaster finishes. The expense of new installation is considerably more than with any other method and does not provide a beneficial return on investment.
My recommendations are for subsurface reinforcement. This method addresses the area of weakness in the plaster system - the attachment of the plaster to the lath - and does it in a manner that works with the existing building's structural system by being flexible, not against it, by being rigid. Additionally, nothing is added to the surface.
Plaster repair is akin to plastering and drywall taping but requires a slightly different skill set. Veneer plastering and drywall taping are modern applications. They are designed for modern buildings, and in this context they work great. But they were not designed for old buildings, and this can be problematic.
When comparing plaster repair methods, it's important to review the performance of the products and their methods rather than the price of the components. The performance is a more accurate indication of overall costs.
These methods all have their pros and cons - project cost, amount of mess, degrees of skill required and longevity of repair are the criteria I like to compare. I would hope that you pick the method and materials that will last the longest for your application and take the least amount of time to improve your bottom line. What is good for the building, delivers what your client requests and improves your bottom line is the best option.

Rory Brennan has spent the last 27 years focusing on the repair of pre-1940 plaster, both flat and ornamental. He is a pioneer in the use of adhesives to stabilize existing plaster and the use of traditional materials in repair. Rory's current endeavor is Big Wally's Plaster Magic, www.plastermagic.com. He can be reached at rbrennan@plastermagic.com.